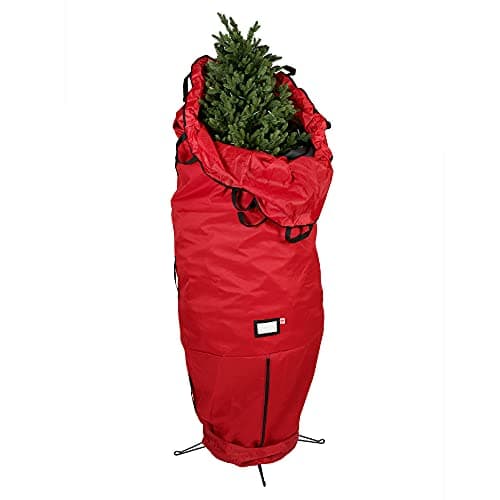
The short answer
Fold the branches upward, measure across the widest point, and buy an upright bag whose published diameter beats that measurement. The Santa's Bags 9 ft upright publishes 40 inches of diameter and 96 inches of height — check both against your tree and your ceiling before anything else.
Why anyone does this
Pre-lit trees. A modern pre-lit tree has wiring running through every section with connectors at each joint, and every year you take it apart you work those connectors once more. They are the part that fails. A tree stored assembled never gets disconnected, which removes the single most common failure mode of a pre-lit tree.
The second reason is simply time. Dismantling and fluffing a large tree is an afternoon. Folding the branches up and rolling it into a corner is twenty minutes. If you have the space, that is a real trade.
The two checks that decide it
Diameter with the branches folded. Not the tree's advertised width, which is measured with the branches fully out. Push the branches up against the trunk and measure across the widest hinged section. On most 7.5 ft trees this lands between 28 and 36 inches; on large or very full trees it can exceed 40, which puts you outside what a standard upright bag publishes — the wider bags, and what each one states, are ranked on the best upright Christmas tree storage bags.
Ceiling height where it will live. A 9 ft upright bag is 96 inches tall — exactly eight feet. A standard basement ceiling is eight feet before ducting. A garage has a door track. If the bag cannot stand up, the whole approach fails, because a 96-inch bag lying on its side is worse in every way than a 65-inch flat bag.
The method
- 1
Strip it completely
Ornaments, garland, tree skirt, topper. Only the tree and its integrated wiring stay. Anything left on will press into a branch for ten months.
- 2
Fold the branches upward, bottom tier first
Work from the bottom up, pushing each branch toward the trunk. Upward is the direction the hinges are designed for; forcing them down stresses the hinge pin.
- 3
Measure across the widest point
Tip to tip at the widest hinged section, with the branches folded. Write it down. This is the number the bag has to beat.
- 4
Wrap loosely
A loose spiral of twine, or three or four hook-and-loop straps, holds the shape. On a pre-lit tree, do not cinch hard: the wiring runs along the branches and a hard strap over a connector is a fault waiting to happen.
- 5
Bring the bag down over the tree
Slide the bag down from above rather than lifting the tree into it. One person can do it; two makes it easy.
- 6
Use the compression straps
The published drawstring and straps at the top are what keep the folded profile from ballooning back out. They are structural, not decorative.
- 7
Move it on wheels or a dolly
A flat furniture dolly under the base works as well as an integrated wheel and does not add height to the bag.
The stand question
Leaving the tree on its stand makes the whole operation faster and adds several inches to the height and the footprint. Taking it off means one bolt or clip and gives you a shorter, more stable package.
If the ceiling is tight, take the stand off and store it in a bin with the rest of the hardware — with the bolts bagged and taped to it, per storing the tree skirt, collar and stand. If the ceiling is generous, leave it on — the tree stands up by itself in the bag, which makes it far easier to handle alone, and a rolling stand turns the trip to the storage corner into a push.
If the numbers do not work
A very common outcome, and it is not a failure. Two fallbacks. First: split the tree once rather than fully — leave the top two sections joined and separate only the bottom — which halves the diameter problem while still avoiding most of the connector cycles. Second: use a flat bag and accept the dismantling, sized from the height and section table.
If the constraint is that there is no floor space at all rather than no ceiling, read storing a tree in a small apartment instead — upright storage is the one format an apartment almost never has room for.
And if the reason you want the tree left assembled is really that you do not want to re-hang two hundred ornaments, storing the tree with the ornaments on sets out what that costs in floor space, which pieces have to come off anyway, and the doorway measurement that decides it.